Appearance
Transmittal Types
Normal Transmittal
A standard outgoing transmittal to send documents to other companies.
Creating a Normal Transmittal
- Navigate to "Send Transmittal" in the sidebar, or select documents in the registry and click "Create Transmittal".
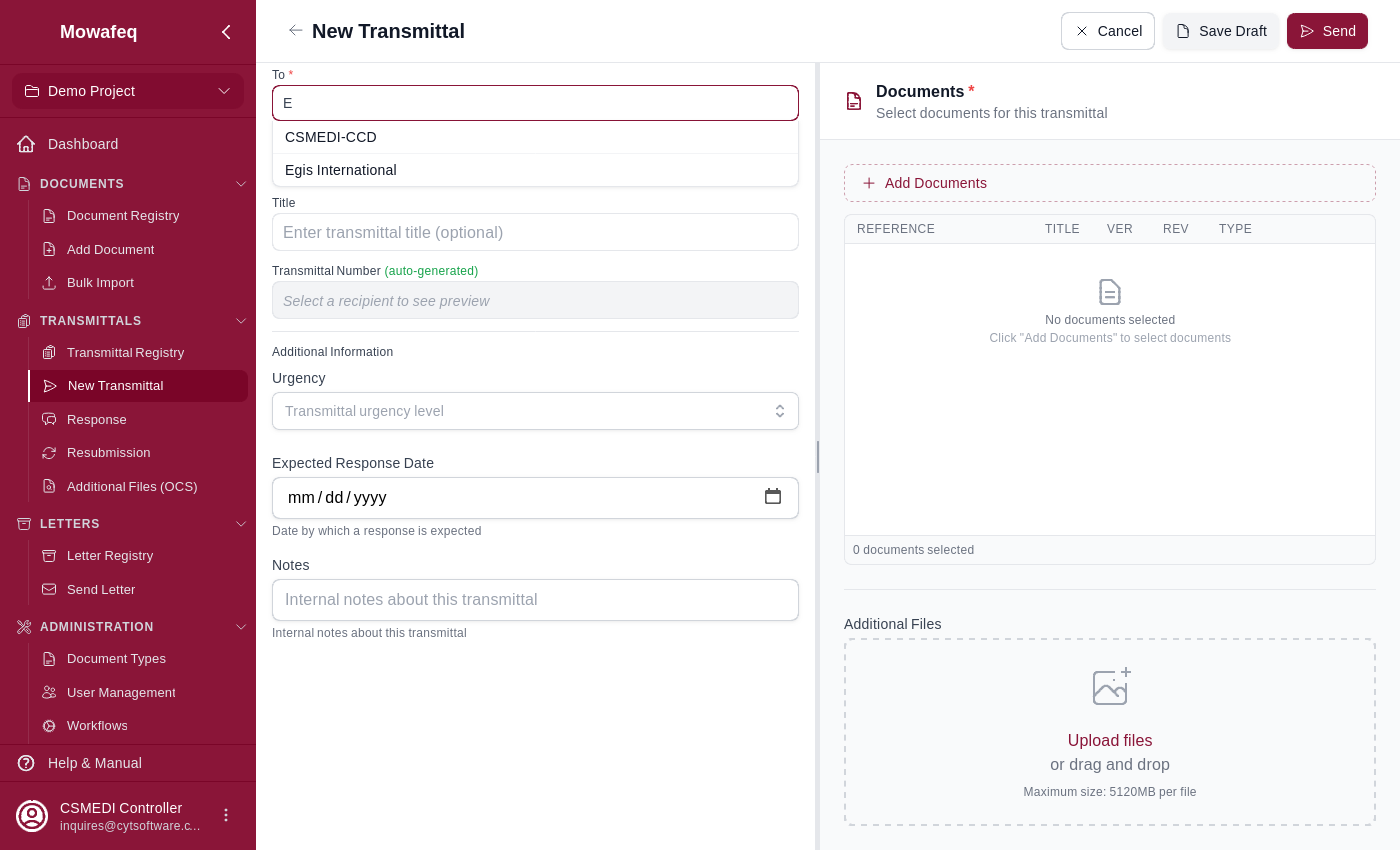
Select Receivers (required): Choose one or more recipient companies from the project.
Select CC Receivers (optional): Choose companies that should receive view-only copies.
Enter Title (required).
Add Documents (at least one required): Select from the document registry or create new documents inline.
Upload Additional Files (optional): Attach supplementary files like cover letters or transmittal sheets.
Fill Custom Fields (if configured): Complete any project-level custom fields.
Click "Send" to send immediately, or "Save as Draft" to continue later.
For a complete sending walkthrough, see Sending Transmittals.
Response Transmittal
Created when responding to documents in a received transmittal.
Creating a Response
Video Walkthrough
Reply to a received transmittal with a formal response.
- From the dashboard inbox "Action Required" tab or a transmittal's detail page, click "Respond".
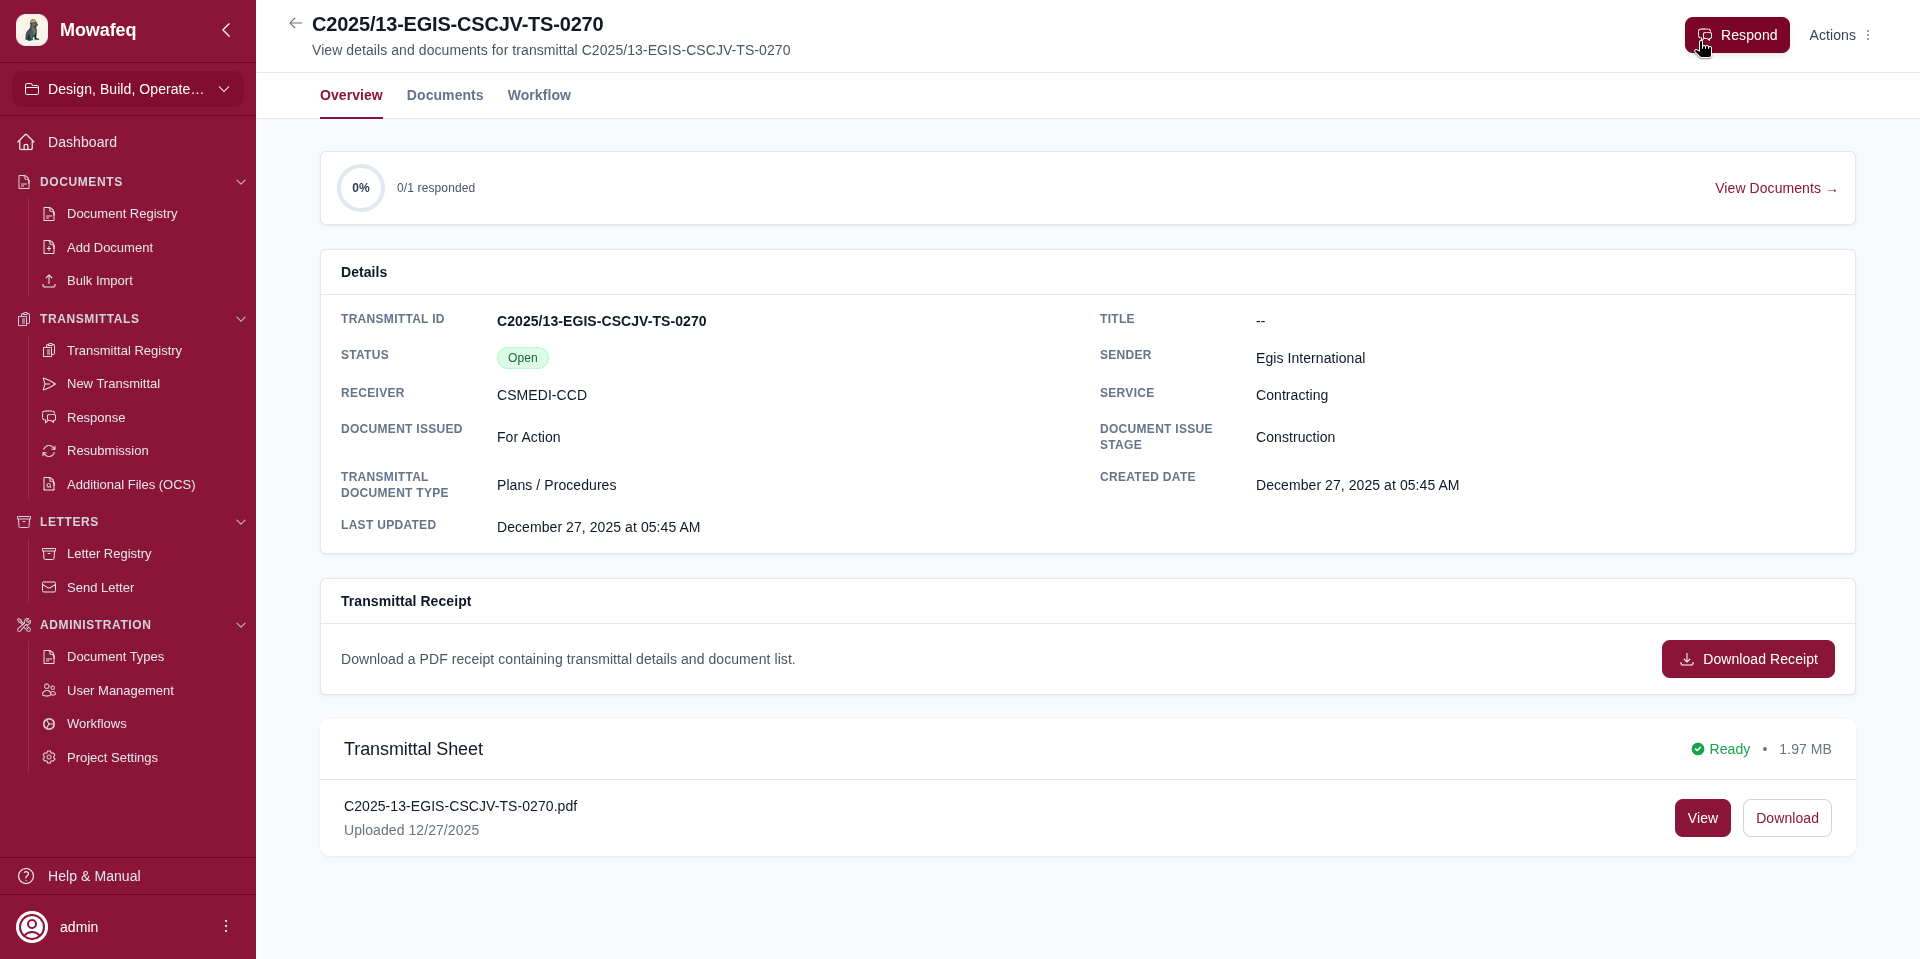
- The receiver is pre-set to the original sender. The title is auto-prefixed with "RE:".
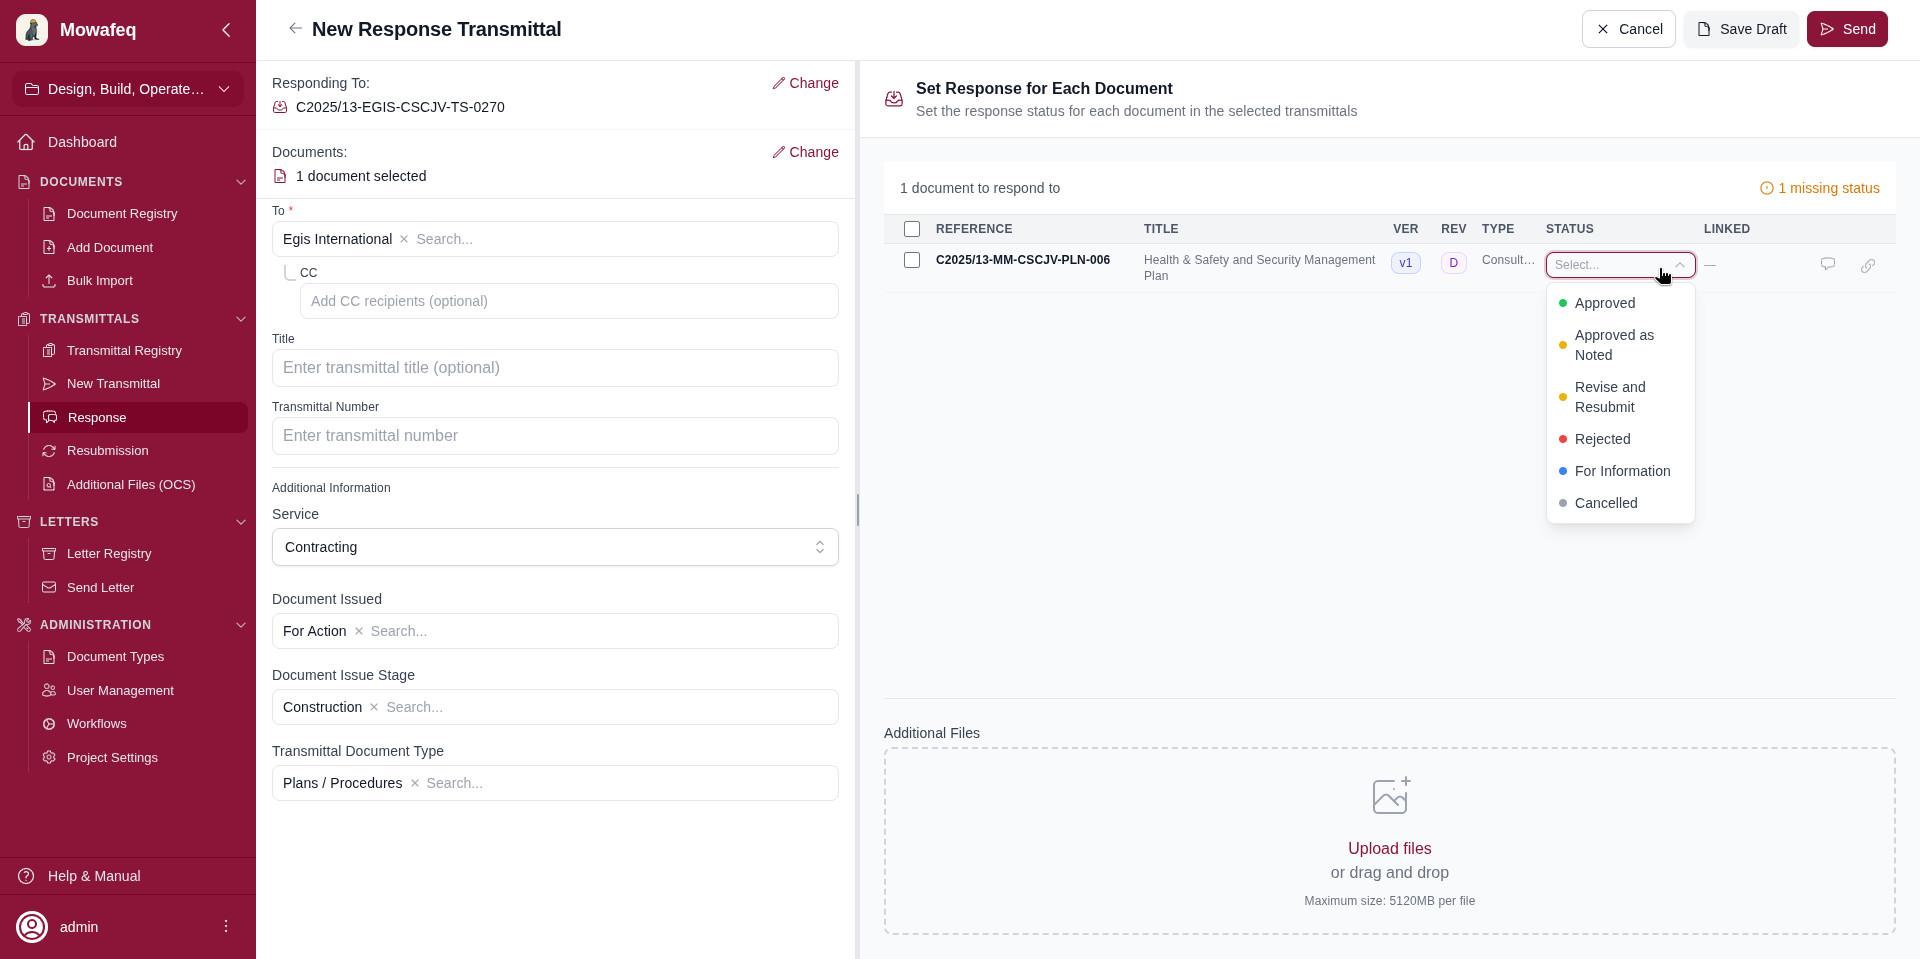
- Choose the documents to answer, then set a decision for each one:
- Response Status (required): Select from project-configured options (e.g., "Approved", "Approved with Comments", "Revise and Resubmit", "Rejected").
- Comment (optional): Add review notes.
- Response Document (optional): Use Attach reviewed copy to create a new version, link a document already in the registry, or register a new document.
- To attach several reviewed copies, select Upload reviewed copies. The matching panel suggests a document from each filename; review each match, correct it if needed, then select Create versions & link. Each file becomes a new version and response document for its matched original.
- You can send a verdict without a response document. The resulting response still appears against the original document as a verdict-only response.
- Optionally add new documents or additional files to the response transmittal.
- Click "Send" or "Save as Draft". Reopen a draft to continue the response later.
Important Notes
- Only companies listed as receivers of the original transmittal can respond.
- You cannot respond to a transmittal that is itself a response.
- Each document can only have one final (non-draft) response across all companies.
- When the response is sent, documents are automatically updated: statuses configured to close documents (e.g., "Approved") set the document stage to Closed, while others (e.g., "Revise and Resubmit") keep documents Open.
Resubmission Transmittal
Created when re-sending documents to the same receivers (e.g., after revising rejected documents).
Creating a Resubmission
Video Walkthrough
Send revised documents after a response asks for changes.
- Navigate to "Send Resubmission" in the sidebar.
- Select one or more original transmittals from the list of eligible transmittals.
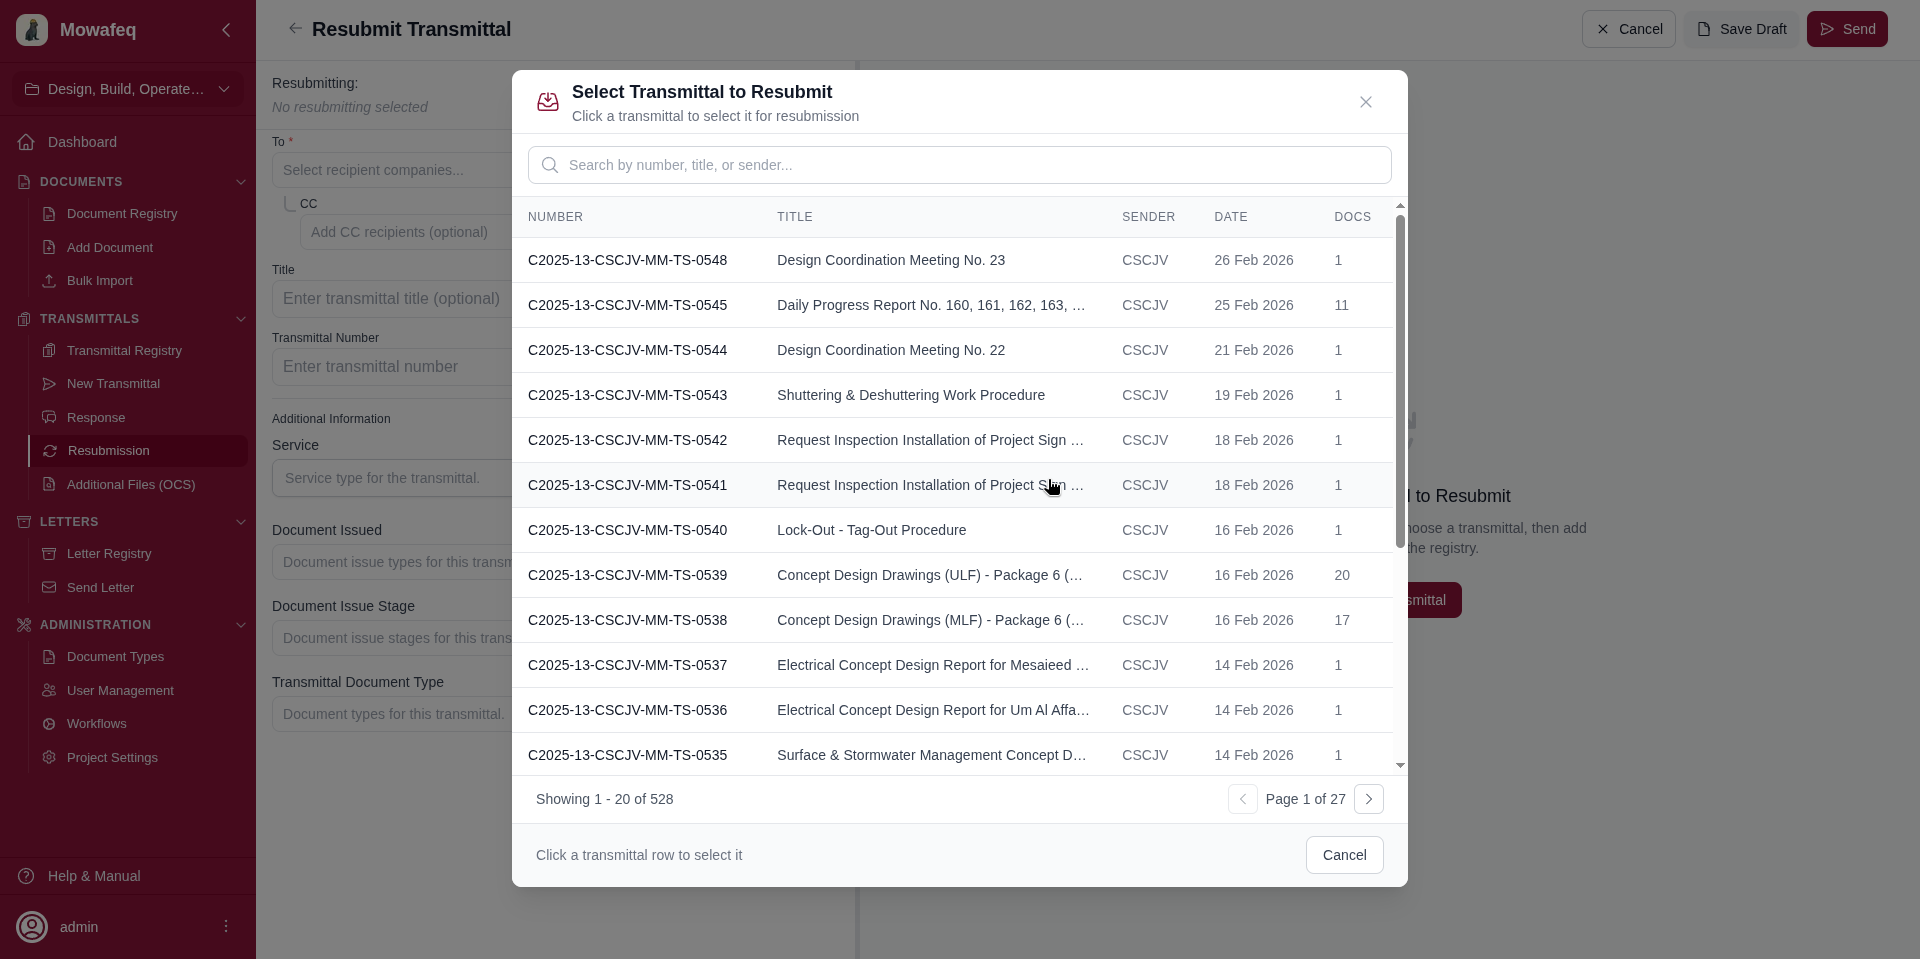
- Receivers and custom fields are pre-set from the first transmittal you select.
- Add the documents or current versions you intend to send. Use Replace only when you need to upload a new file; it creates a new version.
- Click "Send" or "Save as Draft".
Constraints
- Only the original sender company can create a resubmission.
- The original transmittal cannot be a response transmittal.